Item statistics, univariate frequency distributions, or conversions that need to be imported for analysis purposes or A&A in GENASYS should still be imported there, rather than PARcore. Statistics and conversions imported to GENASYS will be available in PARcore and (if applicable) the IBIS Application , but statistics/conversions imported to PARcore do not flow backward to GENASYS.
Preparing Data for Import
The following preparation work is required prior to importing distributions.
1. Use the system defined layout PARcore Import Univariate Frequency Distribution Layout, which includes both the layout format and examples to create your import file.
- The file should be saved as "CSV (Comma delimited)". Saving the file to a different comma delimited extension, such as "CSV UTF-8 (Comma delimited)" may result in errors when importing.
- Only one distribution can be included in one import file.
- Import logic will trim spaces for numeric and character fields if they exist in the import file.
- The context data must exist in PARcore.
- Context data should be repeated for every statistic row in the file.
Importing Univariate Frequency Distributions
Select the Import tile on the Landing Page or from the Main Navigation select Data and Import
1. The Import & Exports page will display with the Import tab selected
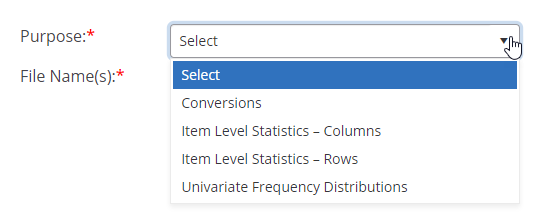
2. Select the appropriate options for the following fields:
- Purpose
- Univariate Frequency Distributions

- File Name(s): Choose the distribution file(s) that you want to import
- The file name will be saved as the Description associated the this request, once the Job is complete.
- If multiple files are selected, each file will have its own Job #.
- Each row in the data file is validated. If errors are found, there will be an error file to download from the Job Details page.
View Import Job
Once an Import job has been submitted, you will be taken to the Jobs tab.

1. The following is a list of possible Status values (select Refresh Jobs List to refresh the jobs status):
• Complete - The import and migration of statistics to SRR was successful.
• Imported - The import was successful, but the migration of statistics to SRR failed. A ServiceNow incident will need to be entered to resolve the failed migration of item statistics to SRR.
• Error - The import failed due to validation errors.
2. When your job has finished and has a Status value of Complete or Error, you will receive an Alert notification in the Global Navigation Alerts.
Import Job Details
Once an Import job has finished, select the Job # link on Jobs tab to take you to the Job Details page. The Job Details displays the following:
• If any import errors were found, an error message will display at the top with a link to download the Error File
• Layout Name
• Username
• Status
• Start Date & Time
• Request ID - A Request ID will be generated if the import was successful
• Import File Name and a link to download the source file
• Job Type
• Purpose
• Number of Records - The number of distributions that were imported
Any PAR user with access to the program the import job was run under will have access to the download file(s). The ability to download the files expires two weeks after the Job Start Date.
